Authenticating your users
In this article we’re going to look at OpenID tokens, how we use them for authenticating your end users and how that forms the Bring-Your-Own-User model - this will let the user’s of your app make direct calls to Doordeck APIs and is the first step to actually unlocking a door.
Setup Your Application
Start by heading over to our application console and logged in or creating a Doordeck account if you don't already have one, hit "Add Application" to get started.
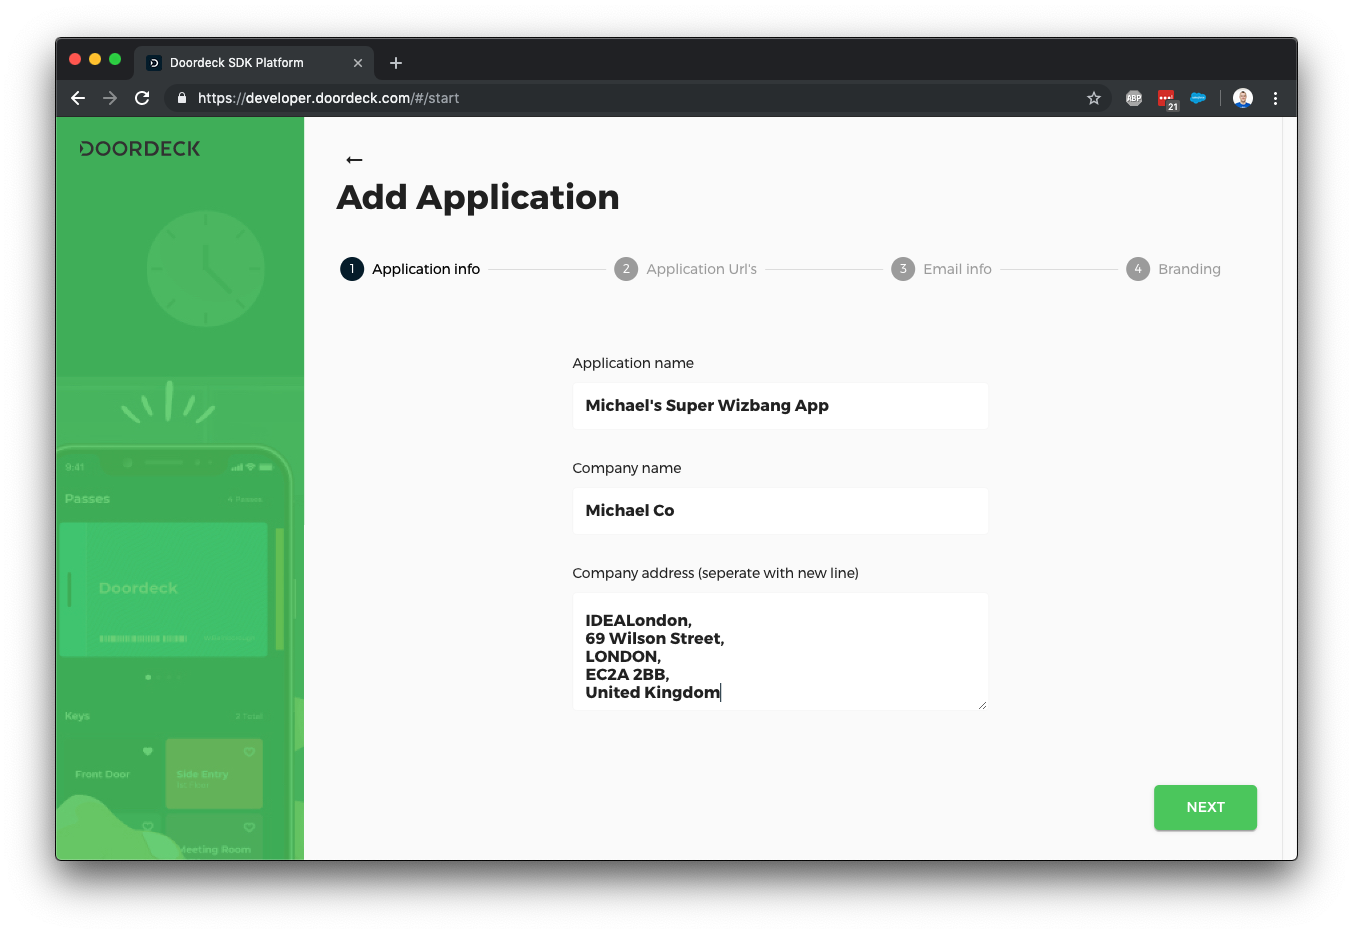
Our application wizard guides you through a few steps, first of all we need to know about your application and company - this information is used in a few places throughout the product.
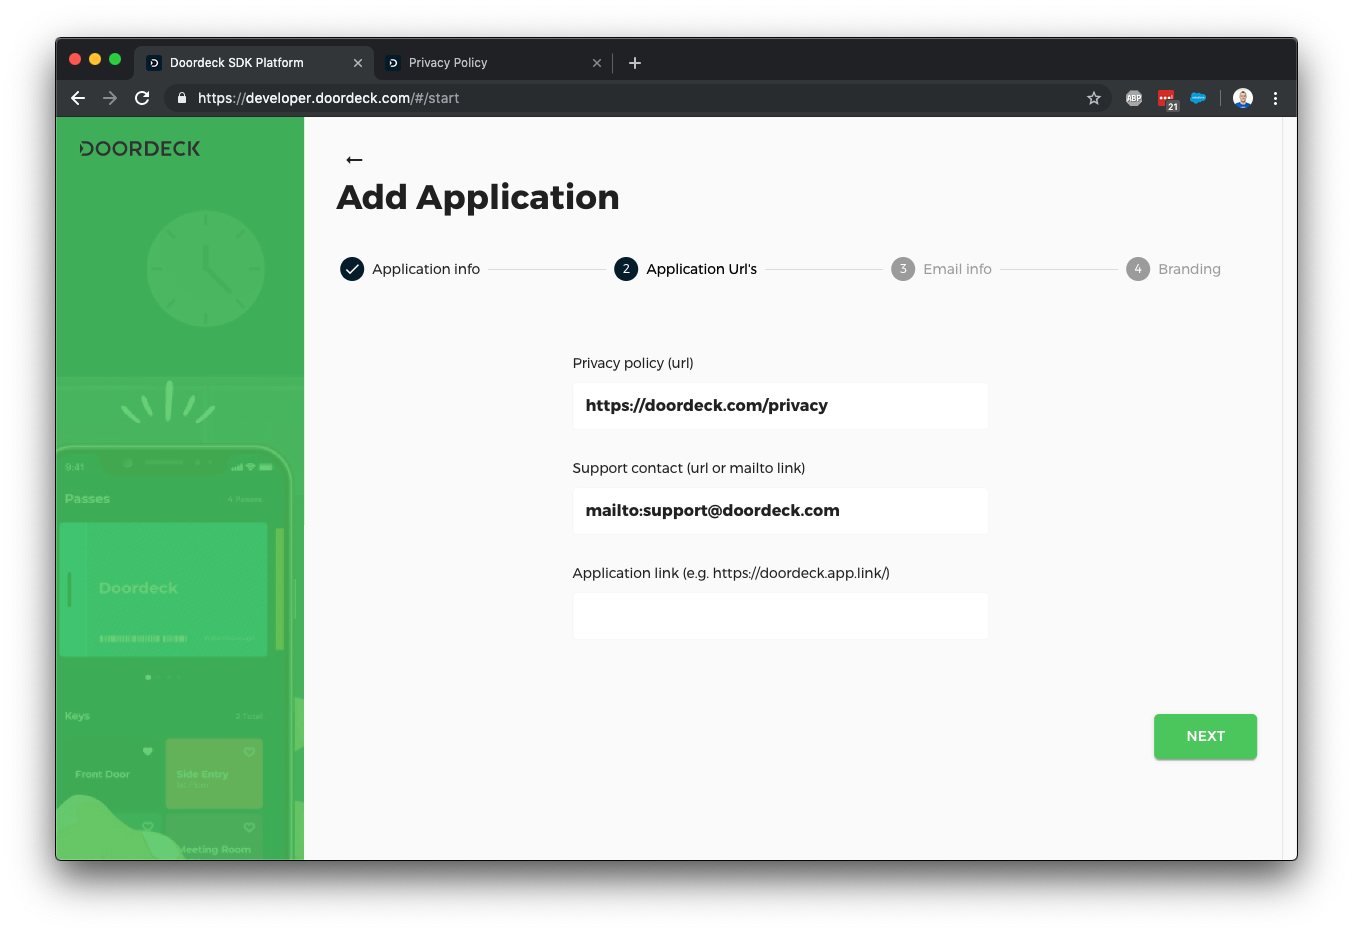
The next screen allows you to configure your privacy policy URL and any support contact details - the application link is in case you have something like branch.io setup for your application so we can launch it quickly, we can come back to this later.
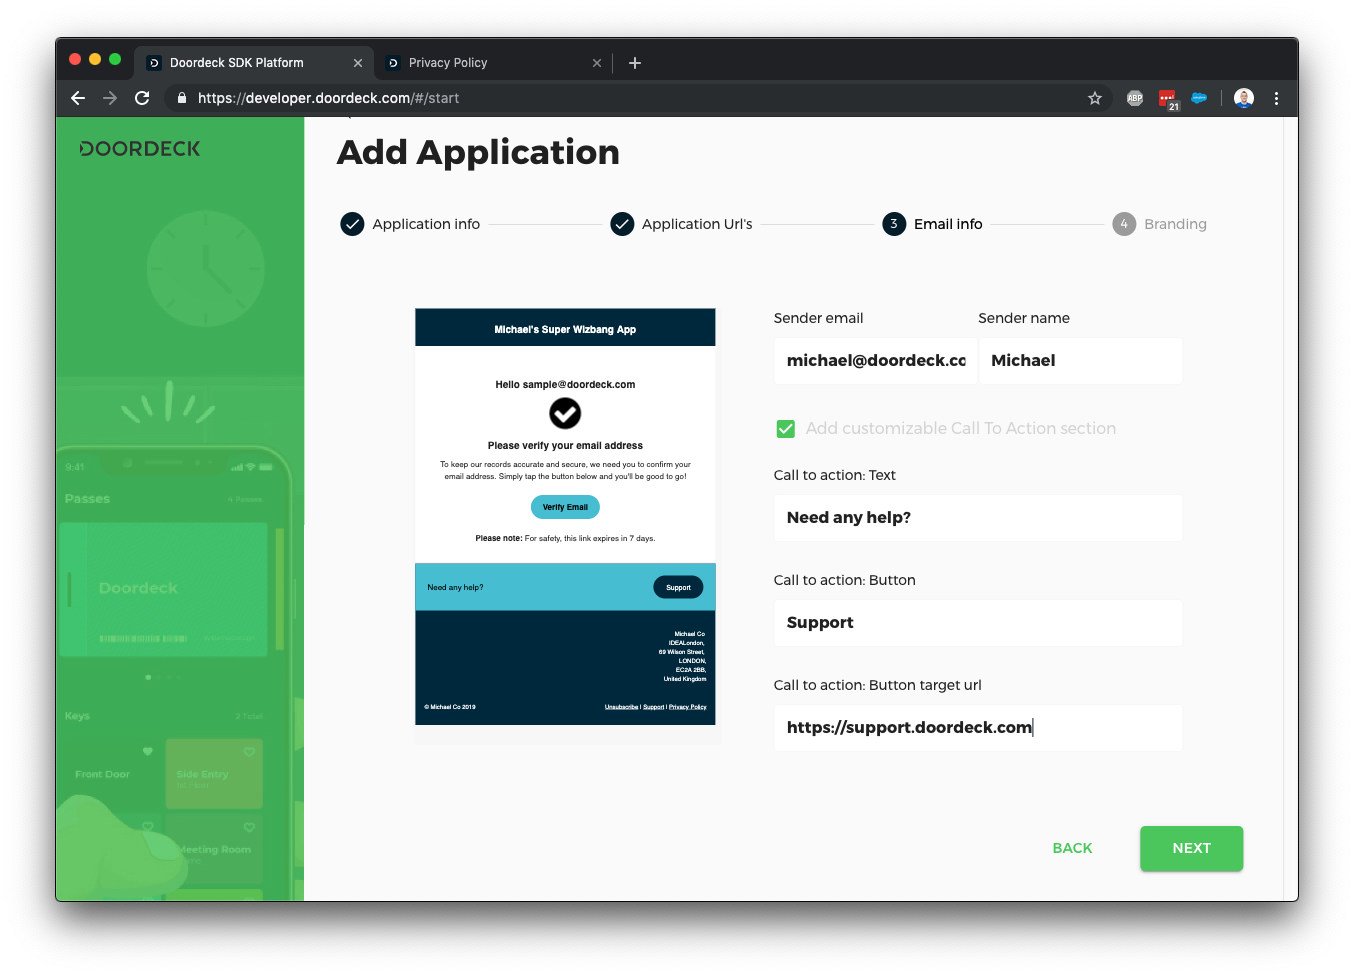
We occasionally need to send emails on behalf of your users (such as secondary authentication checks), this screen lets you customise those emails - we may reach out to you via a support ticket if we need further configuration to send email from your address.
Finally, you can further customise the emails by adding some colour and a logo.

Now we've created the application, we should go in and edit a few further details to get authentication going.
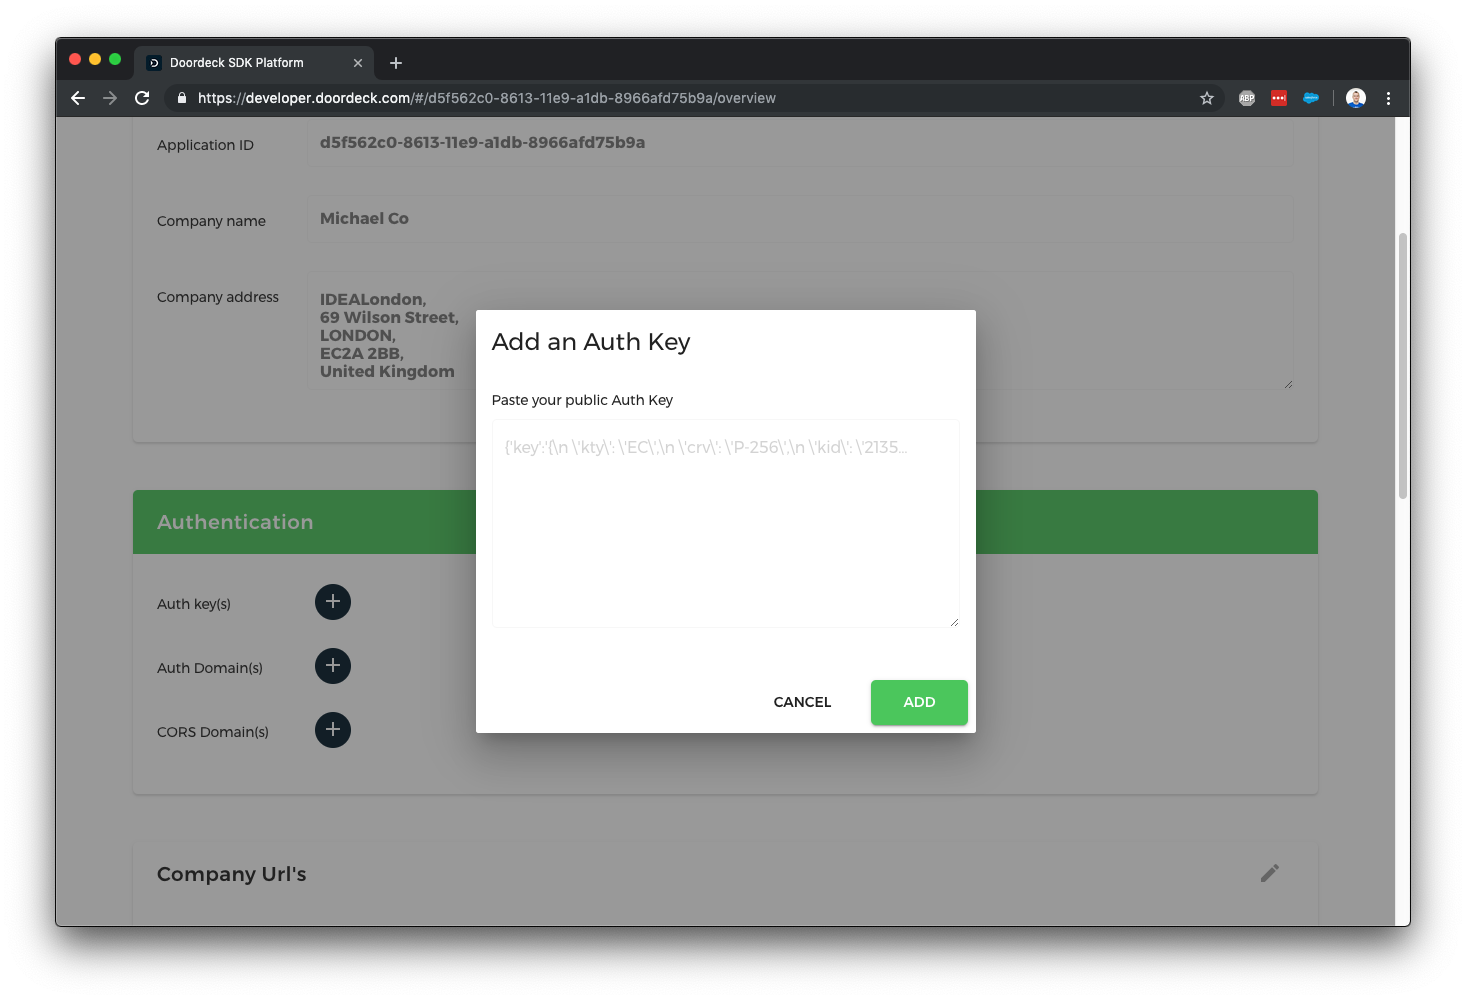
We’re going to need an auth signing key, this must be an asymmetric key supported by JWT, to save explanation time I’m going to suggest using https://mkjwk.org/ to generate either an RSA or elliptic curve key pair but you probably shouldn't use this site for production. Select signing as the key use and give it a unique key ID.
Copy the public key JSON shown above and tell Doordeck about it by clicking the plus next to auth keys on your application.
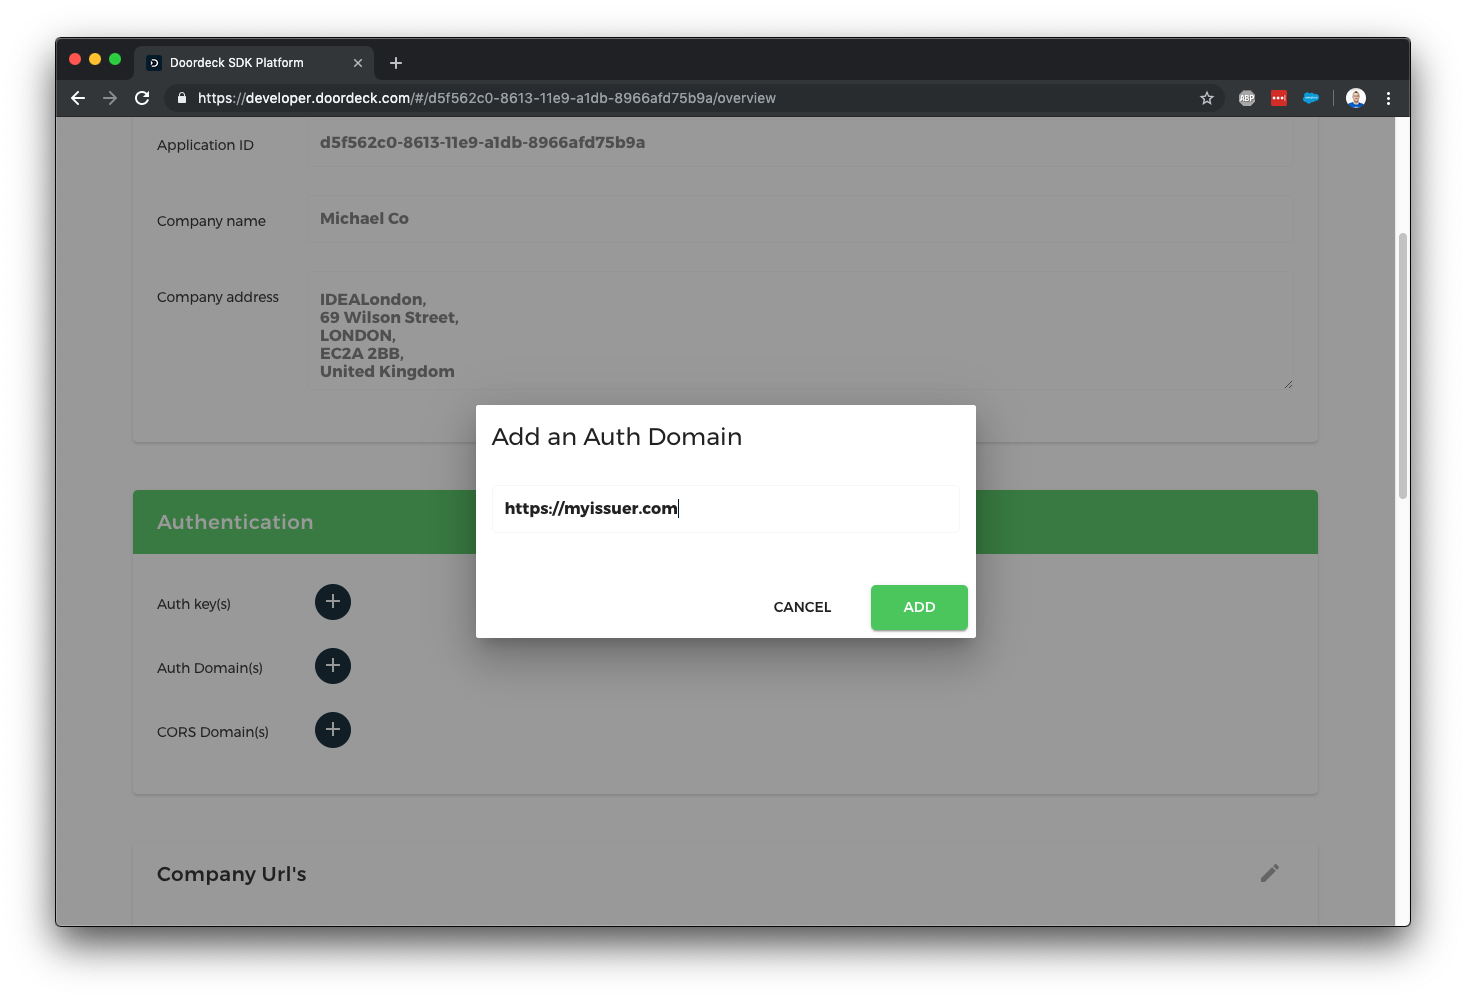
The last step in setting up authentication is to tell Doordeck what your authentication issuer is, this is a URL which you have control over and is unique to each application, e.g. https://myapp.com/ - it can have a path if you need to differential multiple apps on a single domain, you’ll need to reference this URL exactly when creating OpenID tokens. Hit the plus next to auth domains and enter your issuer exactly.
We've not gone through the steps of creating an application using the Doordeck Developer Console, we've created an auth signing key and told Doordeck about our auth issuer, next we'll create some authentication tokens you can pass to your users to make direct calls against the Doordeck APIs.
Generate OpenID Tokens
Thus far we’ve setup an application and told Doordeck what public key we should validate your authentication using, now we can actually start generating some OpenID tokens. OpenID tokens are just Json Web Tokens (JWT) with a specific set of fields - there are hundreds of libraries that can help with generating them so I don’t suggest doing it manually like I’m about to outline.
As a quick aside, we don’t support all of the OpenID tokens, but we won’t reject any tokens that include extra, this is the full list we support:
CODE: https://gist.github.com/mpbarnwell/532d0425abaf22239344151145ba8595.js
Based on the above, a minimal OpenID token may look as follows:
CODE: https://gist.github.com/mpbarnwell/d6fa69cd7244d0f7d671b304007ee132.js
OpenID/JWT also needs a header and a signature, the header is easy enough - we have to state what algorithm we’ve used to generate the signature and the key ID used:
CODE: https://gist.github.com/mpbarnwell/2e1f29c42d51d6d975570c07b9b89451.js
Both the header and the body are usually stripped all of white space then Base64Url encoded and concatenated with a ‘.’ period in between; it ends up looking like this:
CODE: https://gist.github.com/mpbarnwell/89aa4bcdbc3bdeb75d9e997fd4d34783.js
We pass this through a signature generator using your private key from much earlier in this email then we Base64Url encode that and concatenate it onto the end with another period in between, our final auth token now looks like:
CODE: https://gist.github.com/mpbarnwell/37cbfd37f370b84e56c6b4342914a759.js
I’ve glossed over the signature details because there are dozens of websites that explain it much better than I can, this is probably my favourite - https://jwt.io/introduction/
The auth token is now ready to be used to make calls against the Doordeck API.
Security Notes
The auth token generation process described above is only one of a number of security measures we use, you cannot unlock a door solely through the use of an auth token, other cryptographic steps are performed in such cases, these are detailed in other articles.
The key used to sign auth token is however a big security measure and it should be treated as such - you should store it in a Key Management Service (KMS) such as the ones provided by AWS or Google Cloud. You should notify us if it becomes compromised, we support expiry dates on signing keys so you can immediately revoke a compromised key or schedule it for deletion and rotate to a new key.
Many of the fields we’ve mentioned above are optional but encouraged, the more information we know about when the user last logged in, how secure it all was, the better the decisions we can make about when to ask the user for secondary authentication details - these will usually just happen when the user logs into a new device.
User Management Notes
Whenever you send us a new signed user token, we will update our internal representation of that user to match the latest details, our user’s are keyed on application ID + your unique internal identifier (sub field), providing these always remain the same, any of the other fields can be updated such as email, telephone, etc - we make sure to use the issued at date when determining of the data is fresh or not.
We do expect email and telephone details to be unique across your user base, if they aren't, don't use the email or telephone lookup methods described at https://developer.doordeck.com/docs/#get-a-third-party-user-s-public-key.
Testing The Auth Token
Normally the first call you should make is to register the user’s ephemeral key, but we’re going to detail that in the next article - instead, I’ve setup a test endpoint which echo’s back the auth data you’ve provided thus far, you can access it as follows:
CODE: https://gist.github.com/mpbarnwell/786b2c4b0cbbe94f999717da11643ca0.js
Clean Up
If you decide you no longer want your application or want to start again then please delete it, there is a remove button at the very bottom of your application details on our developer console.
Summary
We’ve looked at creating an application in Doordeck and generating OpenID tokens for use with user authentication - the idea here is you’ll have your own authentication in place and can have a single endpoint on your backend which exchanges your own auth token/cookies/whatever into a Doordeck compatible one so the user can make requests directly against our APIs - direct calls help keep latency down.
