Moving Doordeck Fusion To A New Server
This guide explains how to move Doordeck Fusion from one server to another, this guide assumes both the old and new server are fully operation and is not meant as a disaster recovery guide.
Prepare the new server
Start by downloading a fresh copy of Doordeck Fusion, contact support@doordeck.com if you don't have a recent download link.
Install as normal, but don't open the Doordeck Fusion tool at the end of the installation.
Moving configuration from the old server
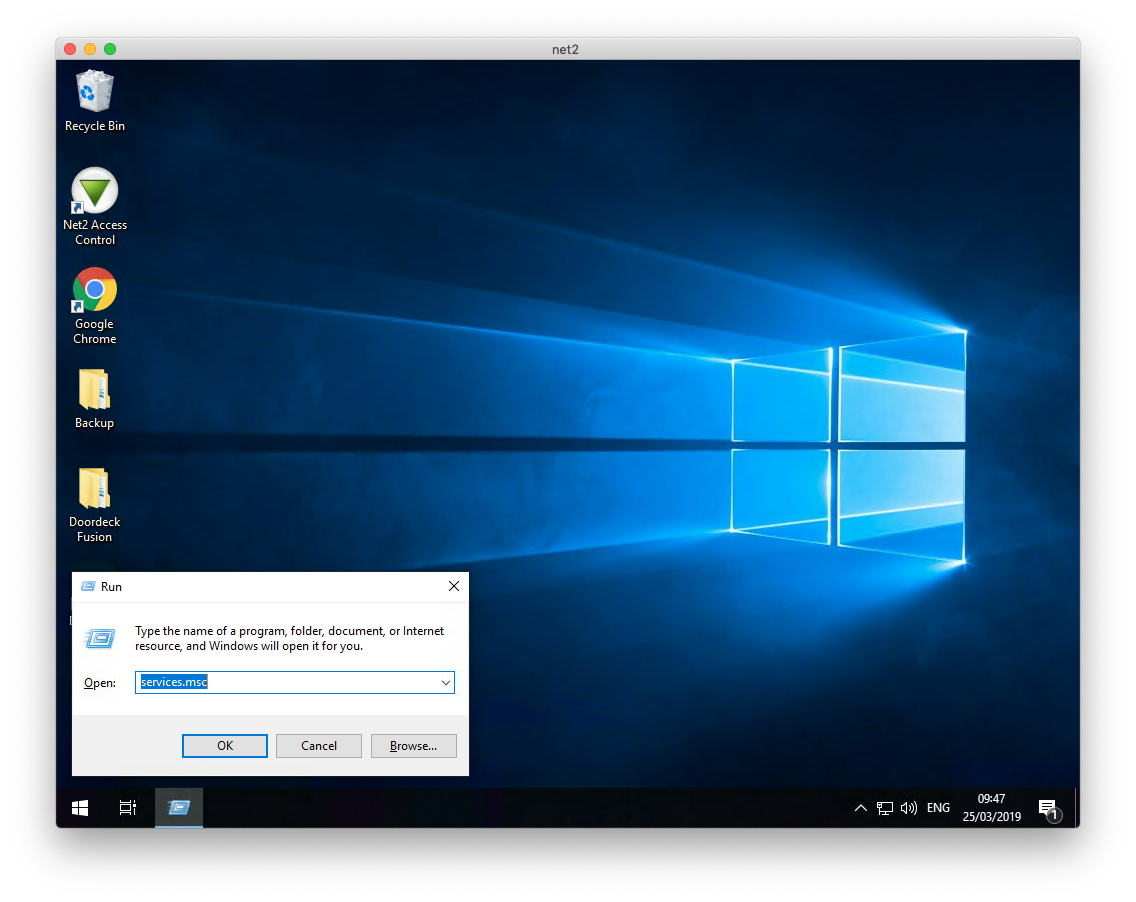
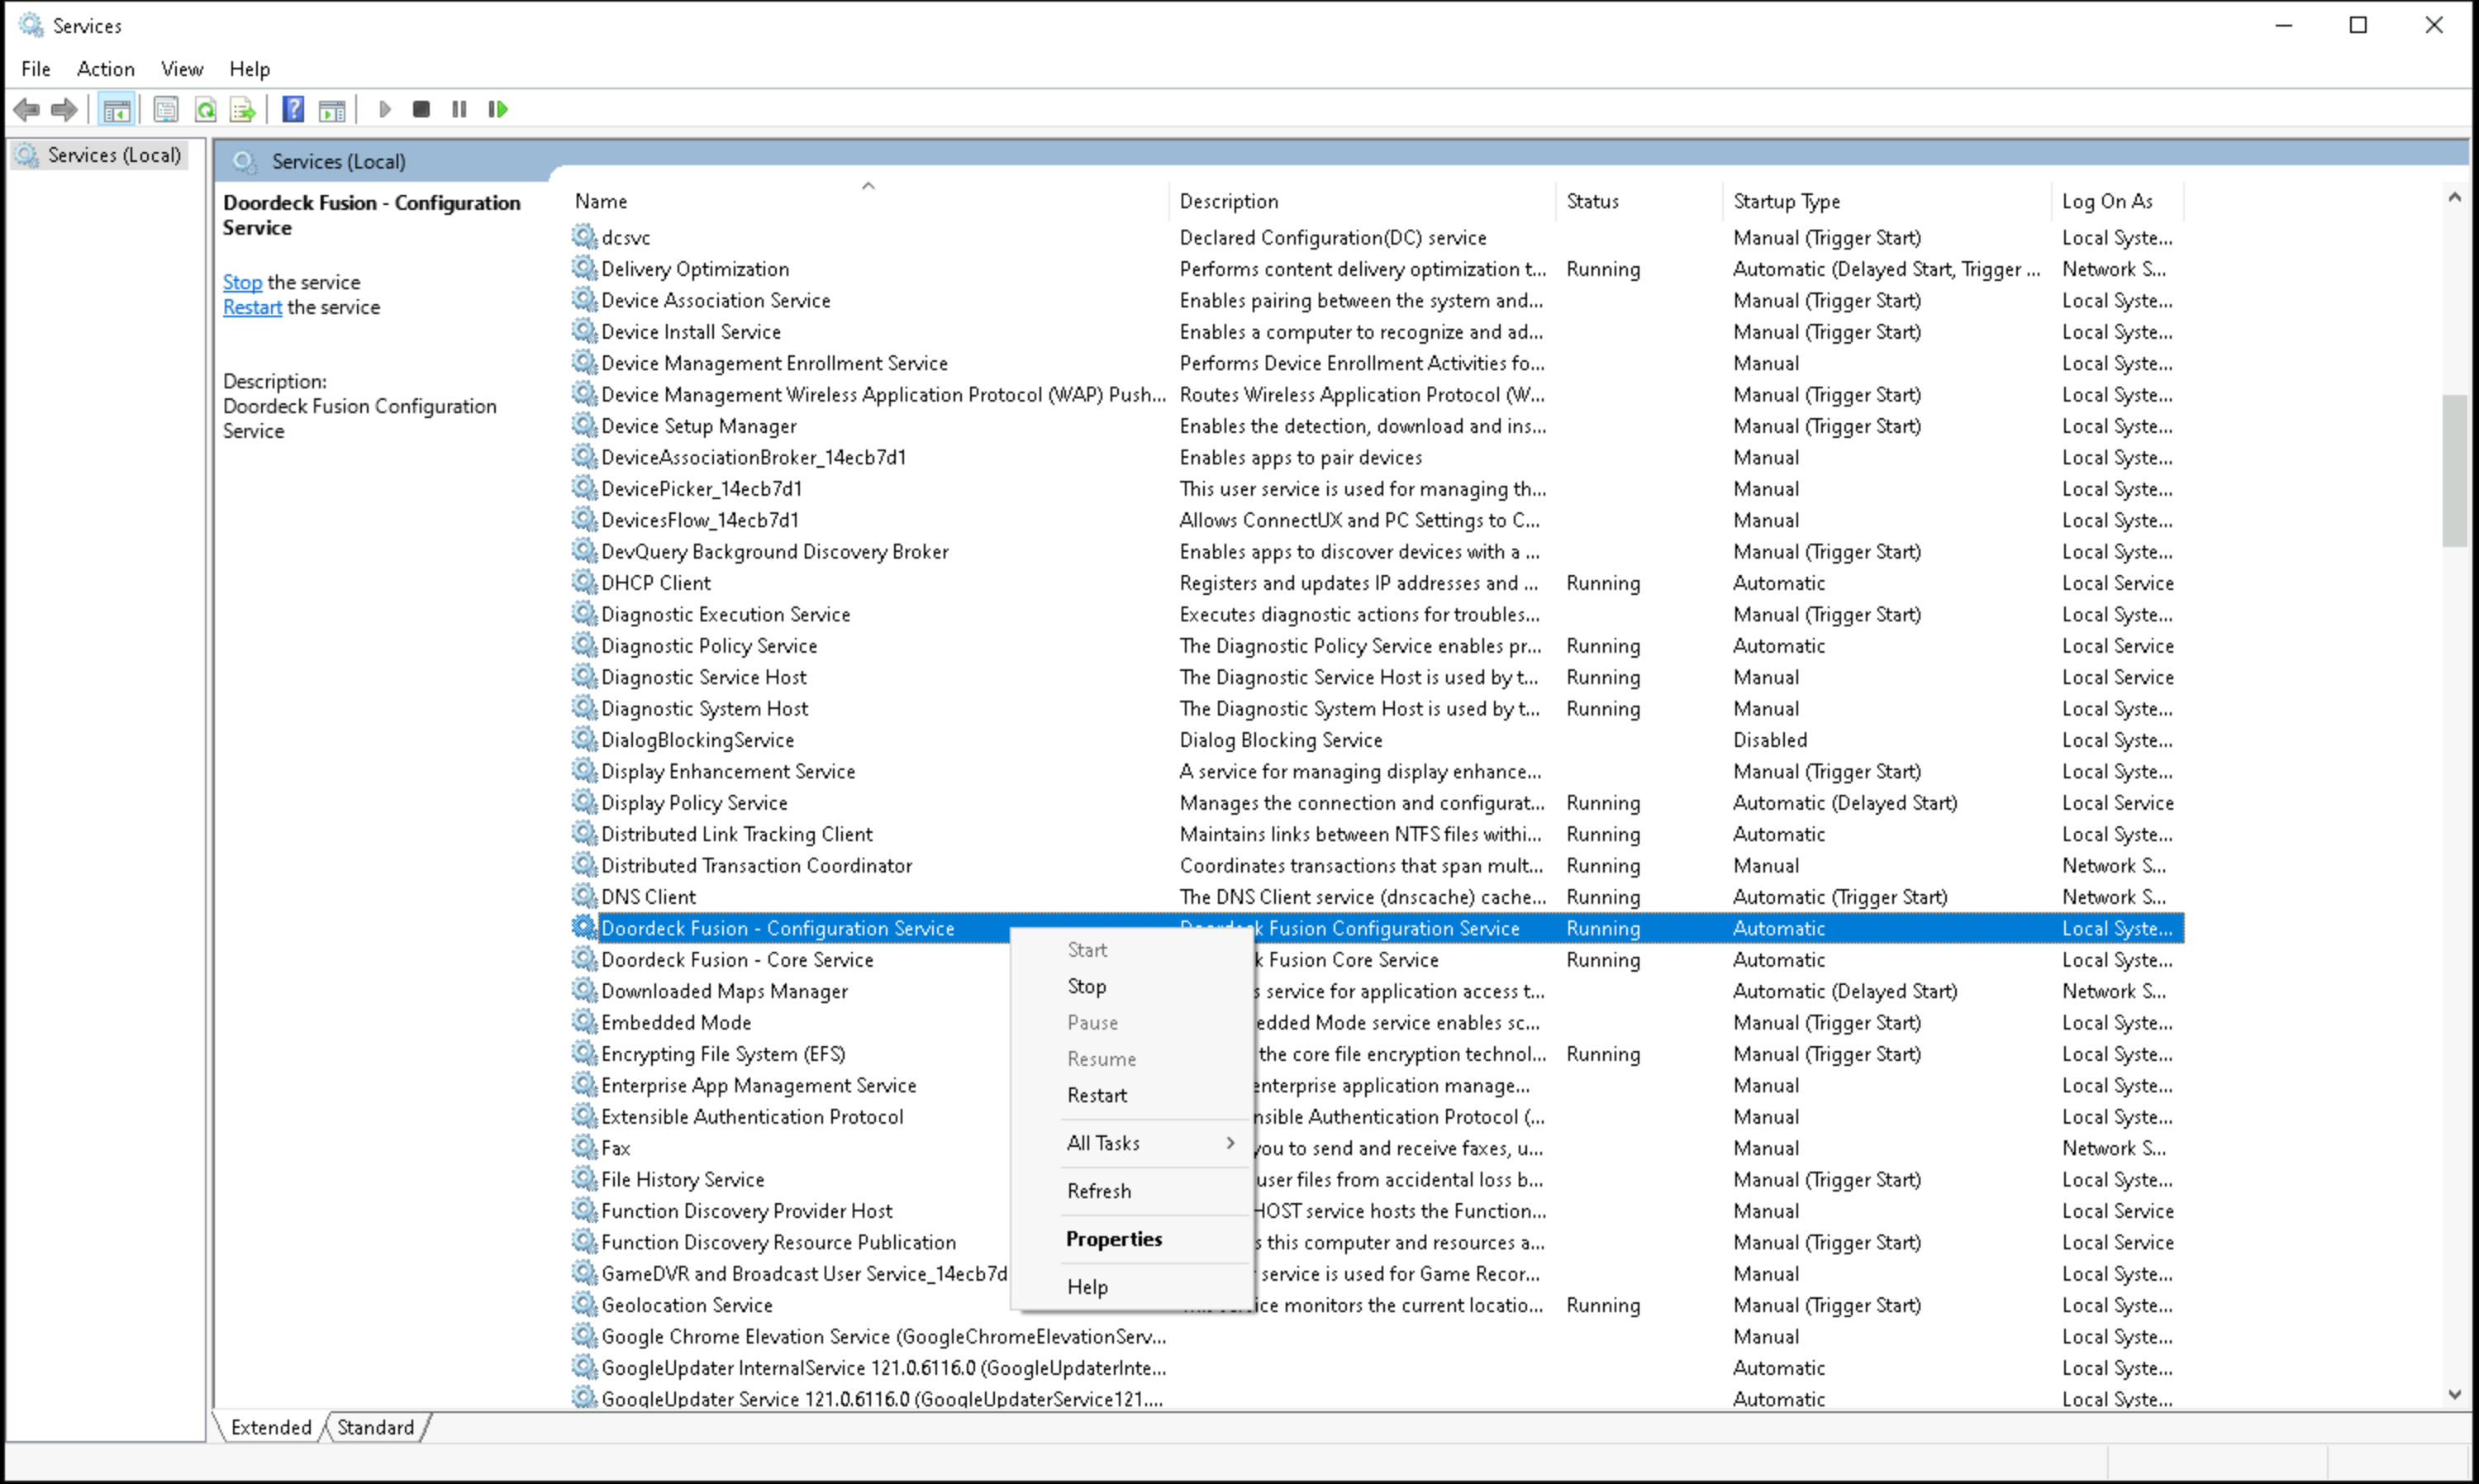
Ensure all of the Doordeck services in Windows Service manager (Start -> Run -> services.msc) have been stopped before starting the migration.
Each door has a dedicated configuration directory, these can be found in c:\Program Files (x86)\Doordeck Fusion\Service, the configuration directories are a bit cryptic sounding but all have a name along the lines of "XXXXXXXX-XXXX-XXXX-XXXX-XXXXXXXXXXXX", where X is either a number of a letter, the screenshot below illustrates this better.
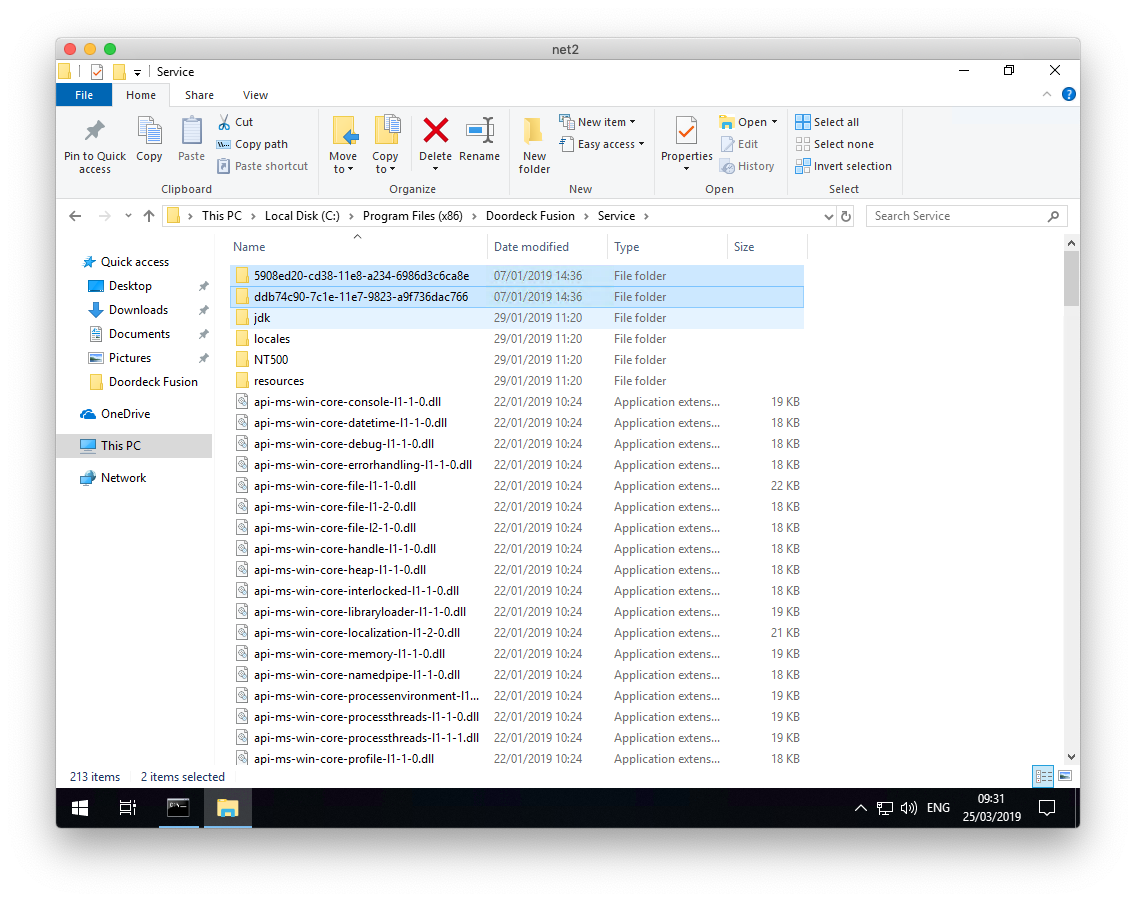
Here we have two doors setup with the names 5908ed20-cd38-11e8-a234-6986d3c6ca8eand ddb74c90-7c1e-11e7-9823-a9f736dac766. Copy all of the door configuration directories to the new server so the directory structure is the same.
Enabling doors on the new server
Now you've moved the configuration across to the new server we need to enable them as Windows Services.
Start by opening Doordeck Fusion and that should show all the doors enabled.
Once all doors have been enabled, you should be able to start the services via Windows Service manager or the Doordeck Fusion tool - each door may take 30 seconds or so to startup, test each door to ensure proper operation and contact support@doordeck.com if you have any issues.
